You don't have any saved projects.
Windows & Mac Downloaded Software
1. Unable to download the Create & Print software?
Possible reasons why you are struggling to download the Create & Print software:
• Your browser is out of date – please update your browser and try again;
• Incompatible browser for the website – try a different browser
**We recommend Mozilla Firefox and Google Chrome;
• Check your internet connection;
• Clear your browser cache;
• Restore your browser settings to default;
• Change your browser ‘default’ file download folder;
• Firewall and/or Antivirus – depending on the configuration it could prevent the download of .exe
or .dmg files, especially on a work network. Please speak to your IT / Network person to allow
access.
1.1 What versions of Windows does the Create & Print software work on?
Our software is compatible with Windows XP, Windows Vista, Windows 7, 8 and 10 Operating
Systems.
1.2. Can I use the Create & Print software on my Mac?
Yes, we have a Mac version of our Create & Print layout software. The software is compatible with
Mac OS 10.6 and higher.
1.3. What are the minimum System Requirements needed to use Create & Print software?
The minimum system requirements to use our software are:
• Mac OSX 10.6 or higher; Windows XP, Vista, 7, 8 or 10
• 2.66 GHz processor or above
• 2 GB RAM
• 2 GB free hard disk space
• An active internet connection
• When uploading your project to our server, we recommend a fast broadband internet connection. We
strongly recommend against using a satellite, dial-up or wireless connection since this could cause
uploading issues.
NB* Please make sure that you are not installing the software on a computer that has the ‘My
Documents Folder’ located on a server. If this is the case, every time you are not connected to the
server, you will not be able to locate your Create & Print projects or be able to save them.
1.4. How do I download and install the layout software?
• Windows – your browser will prompt you to either ‘Run’ the installer file or ‘Save to Disk’.
Click
‘Run’ and the installer file will start downloading.
When the download is complete you will be guided through the installation process by the
installation wizard. After installation, an icon will appear on your desktop and the software will
also appear in your Start Menu. To launch and run the software, simply double click on the icon.
• Mac – depending on the browser you use, the download will either start automatically, or you will
be prompted to click ‘Save File’.
Once the download has completed, simply double click on the installation file and follow the prompts
– drag the software folder into the Applications folder – then you should be able to open the editor
directly from your Applications. The icon can also be dragged down to the dock so that it is easily
available.
1.5. How do I update my software? What do I do when I am notified of updates?
If you are connected to the internet, you will be notified of any new updates when you launch your
software. You can choose whether you would like to download the updates or not. These updates may
include new products, page styles, backgrounds, scrapbook artwork etc.
1.6. I can’t install the software on my Mac, I keep getting the message that it is from an
‘unidentified developer’?
The error is due to your current security settings. You will need to disarm ‘Gatekeeper’ on your Mac
temporarily in order to install the software.
Please follow these instructions to install:
• Click on the Apple icon on the top left of your screen
• Open System Preferences in the dropdown
• Click on the ‘Security & Privacy’ icon
• This will open a new window – Under the ‘General’ click on ‘Anywhere’ under the section that says
‘Allow applications downloaded from: ’
• A pop-up will now ask you to confirm your choice ‘ Allow from anywhere’
• You will now be able to install the software by dragging it into your applications folder. You
will also be able to pin it to your task bar if you wish.
NB* We suggest that you revert your settings after installation to improve your security on your
Mac.
Issue
Where does TAOPIX Designer store the installed/downloaded content e.g. masks, backgrounds, and
products?
Technical Information
When Taopix Designer downloads new Products and Application Library Items; it uses hidden folders to
store this data. Taopix Designer needs to sort the installed/downloaded content in a location
specific to the local user on the local machine. It may be sometimes necessary to delete this
downloaded data.
Solutions
The location of the folders is different depending on the operating system and is specific to the
logged on users. So if two users have accounts on the same machine, they will each need to run check
for Updates to gain access to new products and application items. This will mean that two copies
will exist.
In all cases listed below
On Mac OSX
System Disk:Users:
On Windows XP
Drive:\Documents & settings\
On Windows Vista and Windows 7
Drive:\Users\
• Your browser is out of date – please update your browser and try again
• Incompatible browser for the website – try a different browser. We recommend Mozilla Firefox and
Google Chrome
• Check your internet connection
• Clear your browser cache
• Restore your browser settings to default
• Change your browser ‘default’ file download folder
• Firewall and/or Antivirus – depending on the configuration it could prevent the download of .exe
or .dmg files, especially on a work network.
Please speak to your IT / Network person to allow access.
Taopix Wizard
The Taopix Wizard is designed to build a project for your customers in a few clicks.
The steps
1. The customer chooses their product (e.g. 30x30 Photobook),
2. The Wizard will then ask for the customer to choose some pictures to be used in the album.
3. Once the customer has imported their pictures, the Wizard will ask the customer to choose how
many pages they want to include (the minimum and maximum number of pages is set by the Administrator
in the Product Settings).
4. Once they have chosen the number of pages, they can choose a background (this will apply to every
page in their book).
5. The customer then names their project and clicks create.
6. The project will open with the customer’s pictures already in place.
The algorithm
When the customer adds their pictures using the Taopix Wizard, the software will work out how many
picture boxes are required to import all of the pictures into the book.
The number of pages required depends on the Page Styles saved within this product, and how many
picture boxes are saved within the page styles.
Example:
If the customer adds 100 pictures, 100 picture boxes will be required.
If the product has several page styles included, and the most picture boxes saved to a Page Style is
10. The lowest number of pages required will be 10.
If the product has page styles with a minimum of 4 picture boxes per page, the customer will be able
to use up to 25 pages.
However, this also depends on the minimum and maximum page range this product has.
Possible issues to consider
Because the products page range, and page styles are set by the Administrator, it is not always
possible for the customer to add all of their pictures to a project, or in some situations the
customer may have too few pictures to fill the product.
Scenario 1.
A product is designed by the Administrator, with a minimum of 24 pages allowed.
A customer adds 20 pictures to the wizard and continues to the next screen. They are told they do
not have enough pictures to complete the album. The customer cannot continue without adding more
pictures, but they have already selected all of their images they wish to print.
Scenario 2
A product is designed by the Administrator, with a minimum of 12 pages allowed. They have created
several page styles, but the lowest number of picture boxes on a page is 2. Making the number of
pictures required 24.
The same customer adds her 20 pictures to the wizard and continues and is faced with the same
problem as Scenario 1.
Scenario 3
A product is designed by the administrator with a minimum of 12 pages, and a maximum of 30 pages.
They have created several page styles, the lowest number of picture boxes on a page style is 2, and
the most is 4.
A customer adds 150 of their archived photo’s using the wizard. They then choose to include 30 pages
to the project, but the wizard tells them they need to add more pages to use all of their pictures.
The highest number of pictures this product can use is 120 (4 picture boxes x 30 pages).
Solutions
To avoid the above scenarios, and to keep hold of your customer, Taopix has a couple of simple, yet
crucial guidelines, which should be met when enabling the Wizard.
1. Allow a lower minimum number of pages in a product (around 12 pages).
2. Create a good variety of page styles, including page styles with just 1 picture box, up to at
least 5 or 6.
Issue
Customers cannot upload their projects and receive a “Could not transfer the file ‘Manifest’” error
message.
Technical Information
When an order is created, Taopix Designer creates a file that contains a list of every file that
will be uploaded; this file is called ‘The Manifest.’
During the Taopix order upload process, the Manifest is the first file to be uploaded to the Taopix
Server.
Some common problem which could prevent the upload from working are;
• No/limited connection to the internet
• A router
• A software firewall
• Antivirus or anti-malware software
• Or a combination of these factors
Please note. The manifest file is not damaged; the file should still be intact, but one of the
issues above could be causing the error.
Solutions
Prior to reporting your manifest issue to Taopix, the above common problems need to be investigated
to ensure that your error is not related to one of the above.
Please test the following:
• Do you have a connection to the Internet? Can the customer connect to a webpage using their web
browser? e.g. try to visit www.bbc.co.uk
• Does your internet router/firewall allow FTP (21) connections to the internet?
o Check the logs on the firewall to see if there is an entry concerning Taopix. If there are any
logs, is the firewall is blocking the software?
• Does your software firewall allow connections using the Taopix application?
o Does it allow FTP transfer on port 21? Taopix requires a connection through port 21 for FTP.
• Is their Anti-malware software blocking the file transfer?
• Does the customer use a proxy in order to connect to the internet?
If you have tested all of these areas, restarted your system and the problems still persist, please
contact your support team for further investigation.
Alt+mouse curser = move image inside picture box
Command/Ctrl + Z = Undo
Command/Ctrl + Shift + Z = Redo
Command/Ctrl + (plus) = Zoom
Command/Ctrl + Shift + alt + (plus) = Max Zoom
Command/Ctrl + (minus) = Zoom Out
Command/Ctrl + alt + (minus) = Max Zoom Out
Command/Ctrl + C = Copy
Command/Ctrl + X = Cut
Command/Ctrl + V = Paste
Command/Ctrl + A = Select All
Command/Ctrl + Shift + B = Insert Rectangle Picture Box
Command/Ctrl + Shift + O = Insert Oval Picture Box
Command/Ctrl + Shift + T = Insert Text Box
Command/Ctrl + I = Insert Page
Command/Ctrl + Shift + D = Duplicate Page
Command/Ctrl + Shift + I = Add Page
Command/Ctrl + D = Delete Page
Command/Ctrl + F = First Page
Command/Ctrl + L = Last Page
Command/Ctrl + B = Previous Page
Command/Ctrl + N = Next Page
Command/Ctrl + R = Show/Hide Rulers
Command/Ctrl + ; = Show/Hide Guides
Command/Ctrl + ‘ = Show/Hide Grid
Command/Ctrl + G = Show/Hide Box Guides
Command/Ctrl + S = Save
Command/Ctrl + W = Close Project
Mac Specific
Command/Ctrl + , = Preferences
Command/Ctrl + Q = Quit
Command/Ctrl + H = Hide Designer
Command/Ctrl + alt + H = Hide Others
All of our products are designed, ordered, uploaded and paid for through our software, either online or via our free downloadable desktop software.
Under Documents, there is a folder called My Photobooks Projects
(Documents\My Photobook Projects)
Zip the project folder you would like to upload. Then you need to create a folder and add all the
images that you used inside your project into the folder and zip as well.
Go to the link and upload the zip file.
https://filetransfer.io/
You can share a link with info@myphotobook.co.za after uploading your zip file.
Turnaround time will be 10 working days.
Please follow these steps:
Open the software, click on ‘View Shopping Cart’
Click on ‘Incomplete Orders’
click on ‘Send Files‘
Accepted the Terms and Conditions
then click on ‘Start’
The upload options will open
select ‘Upload Order’ to complete your order (internet required)
Alternatively, select the ‘Send Order Via Mail’ option (icon looks like a CD withing an
envelope)
Select ‘Desktop’ as the destination to save to.
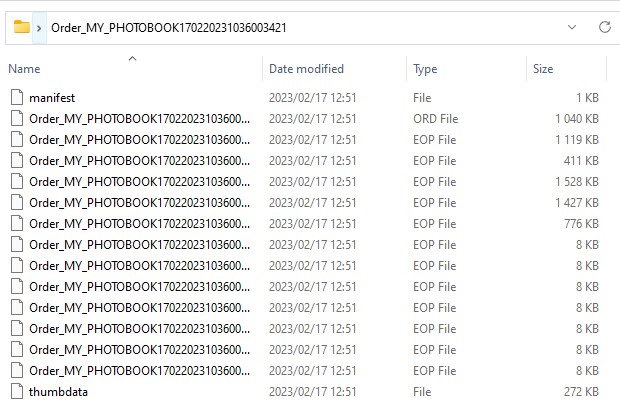
This will create a folder with a name that starts with ’Order_MYPHOTOBOOK’
Right-click on the folder and zip/compress it.
Please zip/compress the WHOLE folder named “ORDER_ MYPHOTOBOOK”
Send the zipped/compressed folder via Fast & Simple File Transfers - FileTransfer.io
(https://filetransfer.io) to info@myphotobooks.co.za.
We will then upload the order for you on our side.
Open the software, and click on “View shopping basket”
Click on “incomplete orders”
Click on “Send files” opening...
Accepted terms and conditions, click on “Start”.
Upload options will open, select "send via mail" (Save the order on your desktop).
Zip the saved folder on your desktop ORDER_MYPHOTOBOOK………
Go to the link and upload the zip file.
https://filetransfer.io/
Please email us on info@myphotobook.co.za to inform us of the uploading of your order, to speed
things up.
Turnaround time will be 10 working days.
The software is no longer reading the location of the images, please ensure that the image names do
not have any characters in them eg _ |: ", create a new folder on your pc with all the images and
follow these steps.
When opening the software and getting the message that you have images missing. Select the find
images options.
In the new pop up you will receive a red list of the missing images. Click on one of these images
and select update.
In the new search browser that opens find the new folder and image. Select the image. Depending on
the naming convention of the images the program will ask if you want to replace the other images
found. Repeat these steps until the list is completed and updated, and select continue.
You will now be able to save and order your project.
Please make sure that you have entered the code correctly into the voucher box.
Make sure the correct product has been created as specified on the special.
Gift carts need to be entered in the Gift cart box.
Please make sure that the file you saved does contain the project elements.
This error suggests that this project has somehow became corrupt.
There is a way of restoring a backup of this project from the projects "History" folder.
To do this, please navigate to the users "Projects" directory. If they are on Mac, this will
typically be in the users "Home" folder.
Once you are in this directory, open the project files for the corrupt project, and rename the .prj
file within this folder. Once you have done this, you can restore the latest backup of the project
from the "History" folder, and rename that backup to be the projects name.